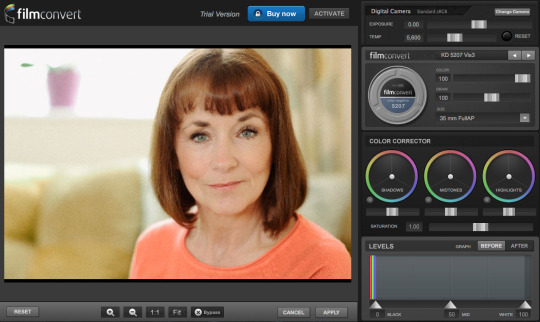
I’ve just downloaded and installed the FilmConvert plugin for Adobe Photoshop as I wanted to see if this add on would be interesting to use.
Paying for the full version I would expect it to be simple to activate but every time I hit the button it is giving me the dreaded Apple beach ball.
So if you want to know if I think it is just a version of Instagram filters for full size images you will have to wait until their support get back to me and I can use this properly.
5 June 2016 So I managed to get it to work now. The screen I needed was hidden behind the plugin interface, so all I needed to do was to move it to one side and the activation screen was there.
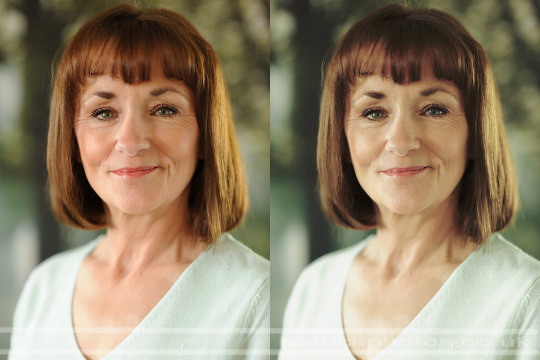
The picture on the left is straight out of the camera and the picture on the right is the one with FilmConvert applied.
Now you could argue if the plugin is worth the money if with a bit of tinkering in Adobe Photoshop or Lightroom you can get the same result. I have to mention at this point that the original was shot as a JPEG and if I had shot in raw I may have seen a bigger difference.
The reason why I don’t shoot in raw but prefer to shoot in JPEG is that it forces me to get it right in camera rather than think oh I can fix that later. If the JPEG is no good I have to ask myself why is it no good? What can I do next time to solve the problem while on set so that it does not happen again.
I do understand why people shoot in raw. Like all good photographic tools there is a time and place for each one. And this article highlights that JPEG v raw debate (which tanks to Twitter was highlighted to me).
Anyway, the plugin is useful for a quick change to the feel of an image so may well come in handy in the future.
